Decorating Your New Extension

Decoration is the final job, apart from clearing up of course, once your extension is finished, and its tempting not to give it much thought until it's time to get on with it. But there are a number of factors you need to consider in order to make sure that you don’t spoil the whole thing by doing a poor quality job on the decorating. Initially you need to decide whether or not you're going to do it yourself. Many people do, in order to save money, but it's worth working out how much it would cost to get it done professionally, for two reasons.
DIY or Professional?
The first is that it might not be as much as you think, and you can view it as buying quality time for yourself, rather than spending it doing something that you might not be so good at and don’t really enjoy. The second reason is that professionals would probably finish the job a lot faster than you would, meaning the inevitable disruption of a building project can dispensed with and the new spaces enjoyed that much sooner.
On the other hand, you may quite enjoy the work and think that you will do a better job because you will care more about the finish. In that case you will need to be aware that the key to a top class finish is top class preparation, as any blemishes left on plaster or woodwork will simply be highlighted by a painted surface.
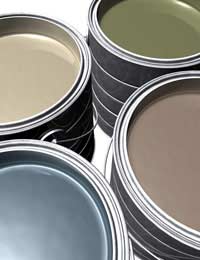
Painting Walls
Make sure newly plastered walls are completely dry before painting or papering them. Rub down the walls with fine sandpaper to remove any 'bobbles' or rough patches and then brush the dust off. Once that's done, paint the edges of the wall with a narrow brush first, top, bottom, left and right, then go carefully around any woodwork, light switches or sockets or other fittings. Then paint the rest of the wall before moving onto the next one and repeating the process.
You are likely to need at least two coats and you should work away from any windows or other light sources. A large brush or roller can be used for the large areas; a brush will be slower than a roller but uses less paint and there's less paint spatter.
Wallpaper
If you have decided on wallpaper, it's well worth investing in a decent pasting table to lay the rolls on while they are glued. First offer a roll up to the wall while it's still dry in order to measure it and cut to length, leaving a good couple of inches spare just in case. Then paste the back of the paper, pick it up in folds, then take to over to the wall and hang it from the top, sliding it into place and smoothing any air bubbles from the top down as you go down with a large brush.
Wait for a little while for the glue to dry before trimming the bottom with the sharpest knife you can lay your hands on, other wise the paper will tear. As with painting, work away from the window for the best finish. Loosen electrical switch and socket faceplates so that when you cut around the paper the edges can be tucked under them. When you screw them back down there will be a neat finish.
Woodwork
Woodwork is best painted with a hardwearing gloss finish, and again, sanding down the surfaces then wiping them clean of the resulting dust, this time with a cloth and white spirit, is of paramount importance. As the wood is likely to be new, dab any knots in it with 'knotting', a product which stops resin leaking out of the knot and coming through the paint.
Once the preparation is over, paint the woodwork with at least one coat of undercoat, preferably two, before applying a top coat of gloss in your chosen colour. In between each coat, wait for it to dry then rub down with fine glasspaper or sandpaper then wipe away the residue as before. This sounds like tedious work but it will give a good quality finish and be more pervious to knocks than hurriedly slapped on coats.
Clean Up Ready For Next Time
Finally, if you want to do any more decorating in the future, it’s worth cleaning out all the brushes, trays, paint kettles, rollers and any other equipment that you used and hanging it up to dry properly. That way it will all be ready for use the next time you decorate, instead of having to go out and buy new gear all over again.
- Exterior Light and Power for an Extension
- A Home Media Centre in an Extension
- Fixtures and Fittings for an Extension
- Shades for Conservatory Style Roofs
- Considering Garden Design Following a Home Extension
- Energy Provision In an Extension
- Plumbing and Heating Considerations for a Home Extension
- Plastering and Finishing in a Home Extension
- Installing Electrics In an Extension
- Curtains and Blinds in Your Extended Home

Re: Building Regulations for Windows and Doors
The article on building regulations for windows and doors provides important insights for homeowners planning to…
Re: Building Regulations for Windows and Doors
"This guide is essential for anyone planning home extensions, as it ensures both compliance with building…
Re: When is an Annexe Not an Annexe?
We have a garden room that we built 15 years ago, separate from our house, as an office. 10 years ago we started letting it…
Re: Using a Computer to Plan an Extension
We want to convert an old house back into one property. It was divided into two, pre 1948, so no plans exist from…
Re: When is an Annexe Not an Annexe?
We purchased our house 9 years ago as a whole property with an office annexe which had a bathroom and kitchen of sorts. It…
Re: Can a Door Open Directly From Bathroom to Kitchen?
Hi I leave in 2 bedroom council property, I have the bathroom downstairs on the ground floor where the…
Re: Keeping in With the Neighbours
My upstairs neighbour is thinking of converting her side bedroom window into french doors and attaching a narrow staircase to it…
Re: When is an Annexe Not an Annexe?
I gained planning for a garage, gym, shower room, WC and playrooms above. For one year my elderly parents stayed using the…
Re: When is an Annexe Not an Annexe?
I have just had a recent conversion of an existing workshop into a annex. It only has a toilet and sink, small area with…
Re: When is an Annexe Not an Annexe?
Difficult one this.So we have permission granted to build an annex.The planning quote as follows. . The proposed…